Making better cyanotypes
Filed under: Cyanotype, Photography, Chemistry
Hi!
This blog post is roughly based on a short talk I gave at HFG Karlsruhe early this year and this is my attempt to finally expand on it a little and make the contents publicly available. It’s not really a tutorial on how to actually make cyanotypes, but more of a general overview of different techniques.
I’ve spent the last 8 years working with cyanotype and have developed some stuff that I think could help make other people’s cyanotypes better. Maybe.
I mean, what even is “better”?
Wait, what’s a “Cyanotype”?

An actual blueprint. Of a house. 
Blueprint of the sewage system of Gary, Indiana. 
Photogram of Chordaria Flagelliformis from Photographs of British Algae: Cyanotype Impressions by Anna Atkins


If you’ve never heard of cyanotype, aka “blueprinting”, before, here is a quick rundown of its history.
Cyanotype is a negative photographic process invented in 1842 by John Herschel, son of the somewhat more famous William Herschel who is mostly known for his astronomy and discovering Uranus(hehehe).
Herschel (the less famous one) was interested in developing techniques to visualize wavelengths of light outside of the visible spectrum and was investigating different iron salts and their reaction to light. In 1842 he discovered the reaction of light sensitive ammonium ferric citrate with potassium ferricyanide, which when mixed in the right proportions and exposed to light would result in the formation of a deep blue pigment.
Even at that time though, with the Daguerrotype already having been invented in 1839, this process was a lot less light sensitive and therefore slower than the other, silver salt based methods of photography1. It was so slow in fact its use was pretty much confined only to making contact prints, where something was placed in direct contact with the paper and exposed to bright sunlight for multiple minutes, leaving behind a shadowy outline of the object on the paper. This was, in fact, how the first ever photographically illustrated book, “Photographs of British Algae: Cyanotype Impressions” by Anna Atkins, was published in 1843.
What it lacked in speed it made up for in simplicity and affordability though, leading to its main use in the 19th and 20th century being the cheap duplication of technical drawings, plans and maps as so called blueprints.2
OK, but why?

Still got it 
It's blue!


I got interested in cyanotype in 2015 when I was looking for a way to make prints from my analogue black and white negatives. I had been doing analogue photography for quite a while at that point but could never make my own analogue prints because I didn’t have the space for the required darkroom. One day I came across a box of “solar photo paper” (which is almost but not quite the same as normal cyanotype paper, but I’ll get to that later) in a craft store and wondered if I could use it to make photographic prints. Since it was a lot less light sensitive than regular photographic paper I figured I might get by without a darkroom and could make due with a resonablydimroom.
Another great thing about cyanotype is that aside from the relatively safe chemicals needed to make the paper light sensitive all you need for development is plain water. After the exposure you simply rinse the print with water and let it dry. It’s that easy. Mostly.3
Chemistry
The chemistry of the classic cyanotype formula is relatively simple. I think. I’m no chemist so to me all of this seems kinda complicated but I’ll do my best to explain everything to the best of my knowledge. But I might be wrong. Just so you know.
The classic cyanotype formula, as handed down to us by Herschel himself4, makes use of two chemicals, ammonium ferric citrate and potassium ferricyanide.
Ammonium ferric citrate is the main photosensitive ingredient. It’s the citrate salt of iron. Basically iron dissolved in citric acid. Like from a lemon. And then there is also some ammonia I guess? As far as I can tell the ammonia complex of ferric citrate is used because ferric citrate by itself is not very soluble in water.
What’s important though is that the iron in ammonium ferric citrate is in its “ferric” +3 oxidation state, meaning it has given away three of its electrons to the citric acid.
When ammonium ferric citrate is hit by light it can undergo a so called photoreduction, reducing its oxidation state from +3 (ferric) to +2 (ferrous), which makes it possible for it to react with the other chemical in the mixture, potassium ferricyanide.
Potassium ferricyanide, which itself is an iron salt, this time of iron and cyanide (and is much less poisonous than other cyanide compounds luckily), can react with the iron in its +2 oxidation state to produce ferric ferrocyanide, aka prussian blue, a deep blue and long lasting pigment.
The deep blue color comes from the prussian blue having iron in both its +3 (ferric) and +2 (ferrous) oxidation state, which is pretty cool I think.
The potassium, just like the ammonia from the ammonium ferric citrate just kinda… hangs out and isn’t directly involved in the reaction5.
Making a cyanotype

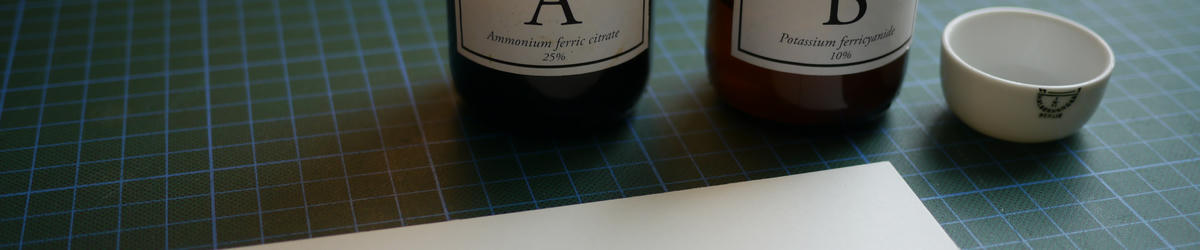
The chemicals. Stylish brown bottles optional but highly recommended. 
The paper. And brush. 
The paper after coating. 
Ready to expose. 
If you're out of sun store-bought is fine. 
After the exposure. The part under the glass is still slightly underexposed. 
After rinsing the print under water. 
Details!


So, “Kris”, you say, “how do you make a cyanotype?”.
Good thing you asked, fictional reader. (I’m sorry, you’re not fictional of course. You’re a very real person.)
Here is what you need for a classic Herschel Style(TM) Cyanotype(R):
- Ammonium ferric citrate, 25g, dissolved in enough water to make 100ml
- Potassium ferricyanide, 10g, also dissolved in enough water to make 100ml
- A piece of paper, like water color paper
- Some kinda brush for brushing the stuff onto the paper
All of these chemicals can be gotten cheaply online on ebay or any kind of chemicals place. The ammonium ferric citrate comes in two variants, green and brown, and for this process you’ll need the green version.
The paper should be “un-buffered” paper, meaning it doesn’t have any kind of basic stabilizing agents added to it to keep it from yellowing or decaying over time. Cyanotypes really don’t like alkaline environments and will fade over time on buffered paper. This is most often the case with regular printer paper, so most watercolor paper should work just fine. You’ll probably want something kinda sturdy anyways since you’ll be washing it later and don’t just want it to fall apart. No toilet paper cyanotypes, sorry. Of course you can also use all kinds of other things that can soak up the chemicals, like ink jet photo paper, cloth, canvas or wood.
Now all you have to do is mix a little bit of your ammonium ferric citrate solution with your potassium ferricyanide solution (1ml of each should be enough for an A4 or letter sized piece of paper) and brush it onto your piece of paper. Now just let it dry in a dark place. Also, like, probably don’t do this whole thing in bright sunlight. A dimly lit room is best.
Once the chemicals have dried you should be left with a light yellow coating on the piece of paper.
Now, take that piece of paper, put some stuff on top (leaves and plant parts are cool), and expose it to bright sunlight for anywhere from 15 to 30 minutes, depending on how bright your sun is.
As the image exposes you should start to see the paper turn pale green, then blueish, then kind of a blueish gray. That’s when you know it’s done, but don’t worry about it too much. There is basically no way to overexpose this.
Take your paper and rinse it in water until the unexposed parts don’t show any remains of the yellow and the water comes out clear.
~~Congratulations!~~
You can now publish your own Anna Atkins style zine of sidewalk weed impressions or something.
Making it better (by which I mean faster)

Contact sheet made from 35mm film 
Contact sheet made from 35mm film 
Historical cyanotype contact print 
Historical cyanotype contact print


Now, as was clearly visible from what we did above, the classic cyanotype formula is slow. Like, really slow. Way to slow to use in a camera or even make photographic prints with.
Well, that’s not quite true. You can make photographic prints using cyanotype, you just can’t use it for enlarging them. If you do the same as we did above but put a black and white negative onto the paper you end up with quite the nice positive print of your image. This was quite a popular way to make cheap prints and proofs of negatives for a while.
Ok, it’s gonna be blue, but still…
Carrying on…
So, the problem is that with this contact printing method the size of your print will always be the same as of your negative.
One way to get around that is by using digital negatives. You digitize your photo (or use a digital photo to begin with), and print it out as a large negative on transparency film. You can then use the same contact printing method as before to make large-ish (depending on the size of your printer) cyanotype prints.
But… I hate that! If I’m going to be scanning my photos and printing them out, why would I go through all the trouble of making analogue prints? I could just print them! The whole point of going analogue is to not have to deal with shitty printers and pay Adobe every month so I can use Photoshop. I am the photo shop! I am the shitty printer!
The other way to get around that limitation is of course to use the traditional method of making enlarged prints from negatives: projecting an enlarged version of the negative onto the paper using an enlarger. All we need to do it to make the paper more sensitive and the enlarger a lot brighter than the kind used for normal photo paper.

Cyanotype print made from 35mm film 
Cyanotype print made from 35mm film 
Cyanotype print made from 35mm film 
Cyanotype print made from 35mm film 
Toned cyanotype print made from 35mm film


And it turns out, making the cyanotype process more sensitive isn’t even that hard!
Looking back through patents from the early 20th century it’s clear that making cyanotypes faster was an important matter for people who wanted to make lots of copies of engineering drawings. And one of the methods that comes up again and again seems to be the simple swap from potassium ferricyanide to potassium ferrocyanide. I first read about the method in Mike Ware’s excellent “Cyanomicon”, the book on all things cyanotype, available for free from his website.6
This has a few effects, the most visible being that when mixing the two chemicals prior to coating the paper with them they already form a small amount of prussian blue which will color the sensitized paper a light blue. This has led to this process being called the “blue layer”7 cyanotype. This isn’t a huge problem though since the blue pigment just sits on top of the paper and washes off easily during processing.
The other effect is that the paper is quite a bit more light sensitive. Instead of taking tens of minutes to expose in bright sunlight the paper now exposes in less than 5 minutes and even exposes well under non-sunlight sources.
Remember that solar printing paper from around 1500 words ago that started this whole journey off for me? That’s the kind of paper it was! I think it’s kinda weird that almost nobody talks about this simple variation to the process that’s able to vastly increase its sensitivity. Even the Cyanomicon mentions it mostly just in passing even though it seems to have been one of the major processes used for industrial blueprinting.8
This major improvement enables the second significant step towards making true analogue cyanotype prints from negatives, the use of an enlarger.
The enlarger

The Embiggener 
Inside of the Embiggener, showing the objective lens, film plane, condenser lens and LED light source 
Another shot of the interior showing the condenser lens 
The Embiggener in action


I call this one “The Embiggener”. It’s a home build enlarger that uses a powerful 100W LED as light source and projects a very bright image, bright enough to expose the new kind of cyanotype paper in around 15-20 minutes.
The construction is rather simple. It consists of a 100W LED, a condenser lens, a negative holder and an objective lens from an SLR. It’s basically the reverse of a normal 35mm film camera, but with a bright light source behind the film.
I’m not gonna go into too much detail for the construction here, since I think it could be done way better with the knowledge I have today, which is a project for future me.
But, if you do want to give this a try yourself, it’s probably easiest to get an old used black and white enlarger and put a bright LED into it as light source. Actual implementation left as an exercise to the reader.
Chemistry, Part II
Ok, so, why is this faster? What’s going on here?
Now, this is only conjecture on my part, because, again, I’m not a chemist, but one of the things about these kinds of metal complexes is that their color depends a lot on the oxidation state of the metal inside them.
The interesting part is that both ammonium ferric citrate and potassium ferricyanide contain iron in its +3 oxidation state. My theory is that since they both contain iron in the same oxidation state they will have very similar absorption spectra.
This is a problem, because it means that a lot of the light meant for our light sensitive ammonium ferric citrate will instead be absorbed by the potassium ferricyanide, where it doesn’t really do anything useful.
Potassium ferrocyanide though contains iron in its +2 oxidation state, giving it a different absorption spectrum and thus not interfering with the ammonium ferric citrate.
Can I prove this? No, not yet, but I can give some good indication that it might be true.
There is another cyanotype process, pompously called the “Cyanotype Rex”, which achieves a similar result in a different manner. It simply coats the paper with the ammonium ferric citrate alone, without adding in the potassium ferricyanide, exposes that, and develops it in a bath of potassium ferricyanide later. In my tests this gave a much better result than the classic procedure, but still not as good as the “blue layer” cyanotype.
I have done a thorough comparison of a bunch of different processes before, which you can check ot in my great cyanotype comparison.
I have done some preparations to thoroughly test this hypothesis, but haven’t gotten around to actually testing it yet. Subscribe to this very blog and you’ll be the first to know!
Of course, this can’t be the whole explanation since the blue layer process is still faster than the cyanotype rex, so I assume that the potassium ferrocyanide is also in general more reactive towards the reduced ammonium ferric citrate.
In camera cyanotypes

The camera ")
Plates with the goop (agar) 
In camera cyanotype negative 
Another one 
Indoor cyanotype photography setup with UV lights

")


Ok, this is cool and all, we can make prints, but… can we ditch the boring store bought film and just make cyanotypes right in the camera already!?
Yes, in fact! We can! If we’re patient.
While the blue layer cyanotype is definitely faster than the regular stuff, it’s still not quite there for in camera cyanotypes. But there is hope!
There are a whole bunch of other iron salts that are also sensitive to light! All of these light sensitive iron salts seem to be salts between iron and a di- or tricarboxylic acids. A lot of these acids are common fruit and vegetable acids like the citric acid in the ammonium ferric citrate. There is citric acid from citrus fruits, malic and malonic acid from apples and oxalic acid from… a lot of plants, really. Also kidney stones.
Out of all of these the iron salts of oxalic acid, specifically ferric ammonium oxalate, seem to have gotten the most attention. And good news, it’s a lot more light sensitive than ammonium ferric citrate!
One of the most common uses for it is in Mike Ware’s “New Cyanotype”, which combines ferric ammonium oxalate with ammonium ferricyanide to create a more light sensitive solution.9
And while it is more light sensitive than the classic formula, I felt like it was severely held back by its use of ammonium ferricyanide. So what if we swapped out the ammonium ferricyanide in that formula for ammonium ferrocyanide?
Well, it doesn’t work. The ammonium ferrocyanide is too reactive and just immediately turns into a large mess of prussian blue. What a disappointment.
But, we can still go the cyanotype rex route and expose the oxalate by itself before developing it by brushing on some ammonium ferricyanide, which is a lot more economical and less messy than having to dunk it into an entire vat of the stuff.
This leads to the by far most sensitive process yet, allowing the taking of in camera cyanotypes in a little as… wait for it… 6 hours.
Yeah, I know… but it works! And that was with a not so great home made camera with a maximum f-stop of f/5.6. So even just switching to a faster lens could probably halve or even quarter that time.
Where to go from here
As you’ve probably seen in the above pictures all my in camera cyanotypes were taken on glass plates since I’ve found them much nicer to work with than paper and I’ve had some bad reactions between paper and the ferric ammonium oxalate, leaving behind ugly brown stains. Also they just look a lot cooler and open up to possibility to make prints from them later!
These plates were made by coating 4x5 inch glass plates with agar which I’ve found to make a great vegan substitute for gelatine, with excellent adhesion to the glass and super easy handling. I’m planning to write up a short article on how I make those soon.
Some of my next steps will be a much more rigorous examination of the interaction between the absorption spectra of the different chemicals, something I’ve already prepared some months ago but never got around to because of a general lack of time and energy.
As I’ve said above there are also a huge number of other light sensitive di-/tricarboxylic acid salts of iron that are worthy of investigation.10 I’d love to improve my chemistry skill to the point where I can actually synthesize these myself.
Another issue is of course the blue color. There are a whole bunch of different methods of toning cyanotypes different colors, mostly involving the use of tannic and gallic acid. After breaking down the developed prussian blue image using a solution of sodium hydroxide the leftover iron hydroxide can be reacted with these acids to form ferric tannate, a dark brown pigment historically often used as ink.
While the blue color doesn’t really bother me it does cause problems when trying to make prints from these cyanotype negatives. The usual cyanotype chemicals are all mostly sensitive to blue light, and with the negative image itself being blue, the resulting prints have a very low contrast. This neatly leads to the next point though: dye sensitization.
Dye sensitization is a process used in standard silver based photography to make the emulsion sensitive to different wavelengths of light. This could be of great help here since not only would it make making prints from cyanotype negatives easier it would also greatly increase the amount of light available for the photoreduction step when using them in camera! I am not sure if this process can be applied here, but I’ve found some references to it in old patents11 and already got some the dyes so I’d love to give it a try!
And lastly, maybe I can make some film? Like, really shitty film? Where it takes and hour to take a picture? But it’d be on a little 3d printed spool and I could design a label for it and give some rolls to my friends to try out.
Really though, why?

Idunno… I don’t like not knowing how things are made.
I don’t want to be reliant on some YouTuber showing me the inside of a Kodak factory.
I wanna be able to do this myself, at my desk, and I want others to be able to do it too. I want to get to know the materials I work with as an artist. I want to be able to still do this after some CEO decides the industrial processes necessary to make regular film possible are not profitable enough anymore.
I wanna do this after the apocalypse, cause surely taking photos is gonna be my main concern at that point.
Also I wanna be the first one to do nudes on cyanotype and I can not sit still for that long!
See ya,
Kris ~<3
Fotnotes
The most common type of analogue photography relies on the light sensitivity of silver halide salts, usually silver bromide and/or silver iodide. That’s basically been the case all the way from the Daguerrotype till modern analogue film.
Aside from these major commercial uses cyanotype has enjoyed a lasting popularity in the arts, in anything from making affordable contact prints of negatives to photograms to gigantic room sized contact prints and fabric design. This is, of course, where its main use lies today.
As with any kind of topic, as soon as you start to dive in a little deeper you’ll encounter a plethora of possible tweaks and additions to this basic method. Even in this post I’ll show you where it might be useful to break with tradition.
Herschel’s formula was actually slightly different and varied in the amount of chemicals used, but the general method is still the same.
It turns out, they do actually matter. At least a little. These spectator ions can get embedded in the crystal lattice of the ferric ferrocyanide and influence its color and light and water fastness.
The second edition of the book now actually features some of my own early work on enlarger based cyanotype printing!
I previously erroneously referred to this as the “blue sheet” cyanotype because I misremembered the name Mike Ware used in the Cyanomicon.
At least it did at the time, see the previous note for updates made in the second edition.
https://www.mikeware.co.uk/mikeware/New_Cyanotype_Process.html
https://doi.org/10.1016/j.ccr.2018.06.008
US Patent US2025675, Light Sensitive Layers, 1933